Before start please make sure you have a BD drive and the blu-ray disc is not damaged. Put the disc into blu-ray disc drive. Get trail version of Pavtube Mac Blu-ray ripper. Note that the trial version of blu-ray ripper copies blu-ray and DVD movie for only three times and have Pavtube logo on the screen.
Getting started
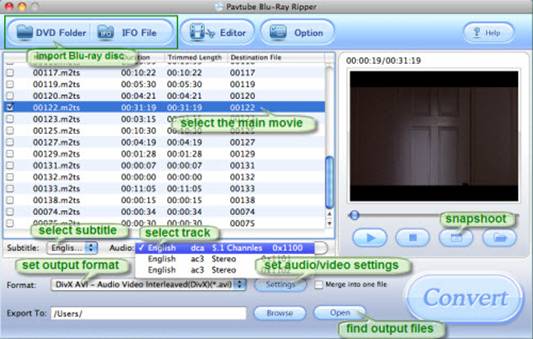
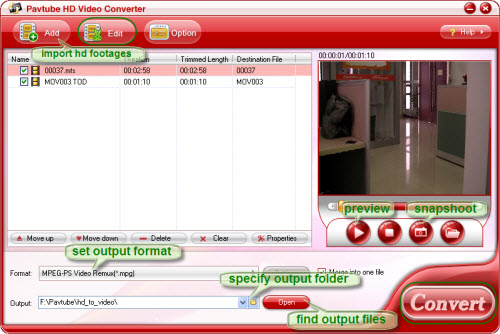
1. Import Blu-ray movie to Mac Blu-Ray Ripper.
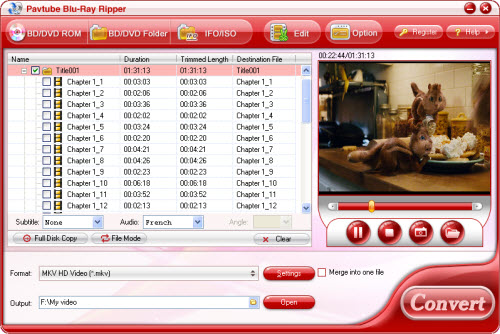
Run Mac Blu-Ray Ripper and you will see the interface as it shows below. The ripper allows you to import blu-ray movie from both disc and folder. For Blu-ray disc, click ‘BD/DVD Folder’ and the ripper will detect and load the disc; for Blu-ray Folder, please click ‘BD/DVD Folder’ and browse to the Blu-ray directory (rather than individual m2ts file).
By default the files are listed in Title Mode, all the chapters are in numerical sequence for you to check individually. For checking the subordinate chapters of certain sequence, please click its plus sign. Generally, ‘Title001’ contains the main movie, and other Titles are commentary, menus, titles and ads.

(BD/ DVD Folder)
A fast way to select the main movie is, right-click in file list field and choose ‘Uncheck All’ in shortcut menu and then check the main movie (longest m2ts file). To check all the chapters,simply choose ‘Check Titles’.
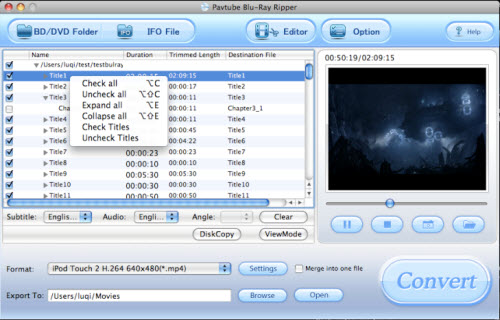
(Pavtube Blu-Ray Ripper for Mac- main interface)
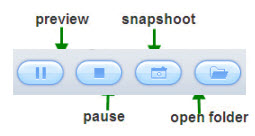
2. Preview the blu-ray clips and take snapshots
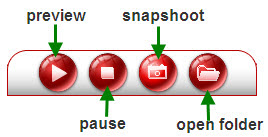
Double-click on a file to preview when you would like to preview it. You can take snapshots when previewing the movie. Simply click ‘Snapshoot’ button. To locate the thumbnails, please click ‘Open folder’ button. To set image format, location and size of thumbnails, please click ‘Option’ menu.
(preview the movie clips)
3. Copy the entire blu-ray structure and contents to PC
To make a quick and full copy of the Blu-ray movie, you can click ‘Disk Copy’ button
 . In this way all contents of the Blu-ray disc will be copied to your hard drive, including the menus, titles, ads, etc. Disk Copy aims to help users to backup the whole contents of a blu-ray disc or standard DVD in the easiest and fastest way. The backup costs much less time than ripping movie to other format. With the Blu-ray and DVD structure, you do not have to create new menu when burning the blu-ray movie to blank blu-ray disc for backup.
4. Play m2ts files on Mac.
After the copy completed, you may click ‘Open’ button
 to locate the Blu-ray directory. Open BDMV-> STREAM folder and you will find all the m2ts movie clips. For playing the m2ts files, you may use VLC player or Mplayer.
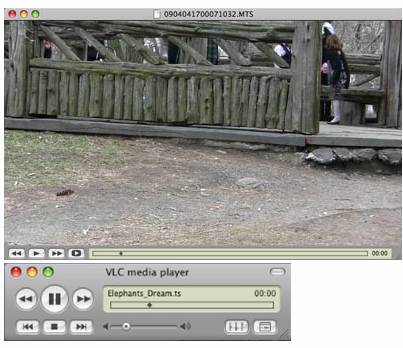
(Play mts/m2ts file with VLC player)
Learn more: Backup blu-ray movie to Mac with Mac Blu-ray ripper in fastest way

 . In this way all contents of the Blu-ray disc will be copied to your hard drive, including the menus, titles, ads, etc. Full Disk Copy aims to help users to backup the whole contents of a blu-ray disc or standard DVD in the easiest and fastest way. The backup costs much less time than ripping movie to other format. With the Blu-ray and DVD structure, you do not have to create new menu when
 to locate the Blu-ray directory. Open BDMV-> STREAM folder and you will find all the m2ts movie clips. For playing the m2ts files, you may use