Windows 7 is the latest version of Microsoft Windows. Unlike its predecessor, it intends to be a more focused, incremental upgrade to Windows. Have you already become a Windows 7 user? In that case, I guess you may have encountered troubles more or less while downloading and converting YouTube videos via this operation system, since it is too new to operate, many YouTube downloaders or converters are not compatible with it. While Pavtube YouTube Converter is an exception, it can work well on Win 7. This guide will show you how to download and convert YouTube videos on Windows 7 through the help of this program. Please feel free to follow its step-by-step instruction as long as you are in need.
Step 1: Download, install and launch Pavtube YouTube converter
As long as you run this program, the following wine red main interface will pop up:
Step 2: Add URL, select output format and specify save path
Click on tag “Add URL” on the main interface as above, and then copy and paste the URL of the YouTube videos which you want to download and convert on your Win 7 to the text box after “URL”. By the way, if you want to keep the original FLV files as well as the converted files, you can tick “Keep FLV source file”, if you just need download YouTube videos without format changing, you can tick checkbox “Only Download FLV source file” to achieve it.An excellent MKV Converter for Mac OS X software to convert MKV video on Mac.
This interface also allows you to set output file name via typing it into the text box after “Save as”, and you can specify where to save the output files by clicking on the ellipsis icon at the opposite side of “Save to”. The two options are optional, if you do not set them, the program will produce a file name and save path automatically by default.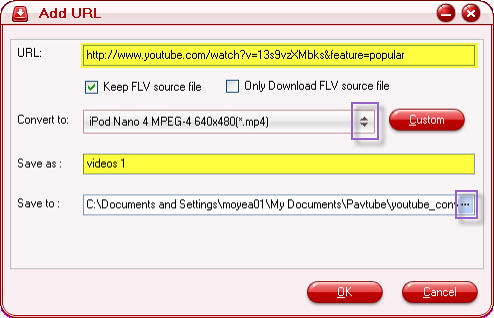
With Mac FLV video Converter, converting flash video .flv to AVI, MP4, MOV, MKV, WMV.
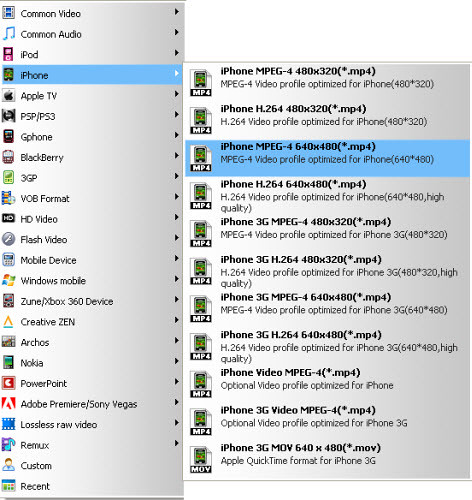
Moreover, you can click on the drop-down button after “Convert to” to select the output file format. Look at the interface below, there are various options, you can choose whatever format according to your own requirements, here I select iPhone MP4 for instance:
Step 3: Custom
If you have higher expectation of the output files, you can click on “Custom” to adjust video and audio parameters like bit rate, frame rate, sample rate, etc. If not, just skip this step.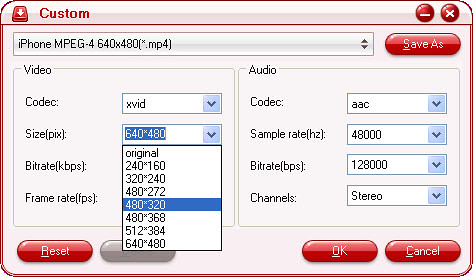
Step 4: Download and convert
Once all the above mentioned settings are completed, just click “OK” to start, and the following interface will show you the downloading and converting info in detail: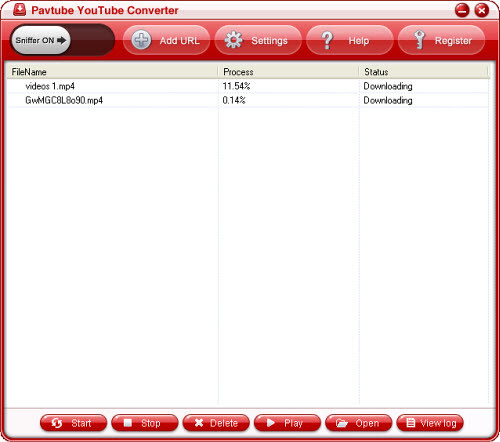
After finished, you can click on the filename firstly, and then click “Open” button to find out the downloaded raw FLV files as well as the converted YouTube files on your Win 7. Only 4 simple steps, you can complete downloading and converting YouTube videos on your Windows 7 smoothly. Isn’t it easy enough and practical? Hope your answers are yea-saying.

No comments:
Post a Comment