As a new coming Windows 7 user, you must have felt troublesome to get an available DVD ripper to work on it. Before its appearance, you may do all the things as below on your old OS, like window XP, Windows Vista smoothly without any difficulties, like ripping your DVD movies for backup with another blank DVDs, or ripping some of the DVD clips which are attractive enough into portable devices like iPod, iPhone, Zune, PSP, BlackBerry, etc. for playback. But why when it comes to Windows 7, all things do not go well? We have to admit that nowadays, lots of DVD rippers in the market lack supports to Windows 7, which is an undoubted fact. Fortunately, there are also some rippers that can work well on Windows 7, and Pavtube DVD Ripper is such a useful ripper among them. To relieve the trouble of Win 7 users, this article here will show you how to rip DVDs to iPod, iPhone, PSP, BlackBerry, etc. on Windows 7 via the help of Pavtube DVD Ripper step by step, just feel free to get what you need from it.
Step 1: Download, install and launch Pavtube DVD Ripper
As soon as you run this program, the following interface will appear: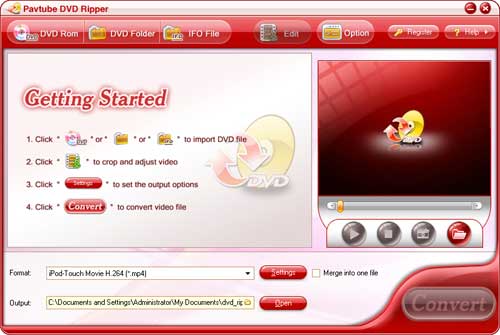
Step 2: Import DVD, select output format and specify save path
There are three ways to import DVD files, namely through pressing “DVD Rom”, “DVD Folder”, or “IFO File”. After DVD files are imported, hit the drop-down list of “Format” to select a video format for your mobile devices. The output formats are all listed as below, you need make a choice according to the types and compatible formats of your portable players. Here I present the best Flash sites of 2007.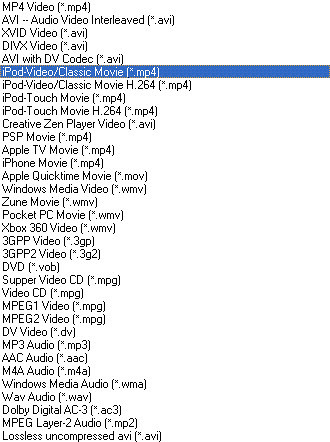
In addition, you should click the folder icon at the opposite side of “Output” to specify save path of the output files, if not, Pavtube DVD Ripper will use the destination folder set by default to store them. Imagine you want to join multiple DVD chapters to be as one file, you can check “Merge into one file” to realize this goal.
Step 3: Set advanced settings
This ripper allows you to adjust video and audio parameters, including video codec, bit rate, frame rate, aspect ratio and so on. Generally speaking, the larger inserted values will produce the better video quality, while the file size will be enlarged as well. On the contrary, the smaller input values, the smaller output file size, but more inferior video quality. Thus you should make a balance between file size and video quality while ripping your DVDs on Win 7.Select the convert tool for your recipe.
Step 4: Convert
After all the settings are set well, you can click “Convert” button to start DVD ripping. Once it’s completed, just click “Open” button to find out the output files, after that you can do whatever you like with these files according to your end use of them.

No comments:
Post a Comment