Has your heart ever been touched by the good and evil of the humanity unveiled in "Avatar"? Have you ever been moved by the unremitting efforts made by Will Smith in "The Pursuit of Happyness"? Have you ever wept for the extremely beautiful but tragic love in "Titanic"? Have you ever been motivated by the movie dialogues like "A strong man can save himself; a great man can save another" in "The Shawshank Redemption"?
So there are hundreds of movies in your DVD collection, wanna rip the classic ones for playback on your new iPad or iPad Wi-Fi+3G in 720p quality? If so, this article will show you how to convert DVD movies for watching on your iPad with excellent quality. Go to find the details from the following paragraphs.
The software you will need is Pavtube DVD to iPad Converter for Mac.
This program is good at removing commercial DVD copy protections, so you can feel free to load almost all of your DVD movies to it to do format conversion, even the latest released ones. More than that, with advanced audio and video in sync technology, it will guarantee the output files well in sync while playback on your big screens iPad/iPad 3G.
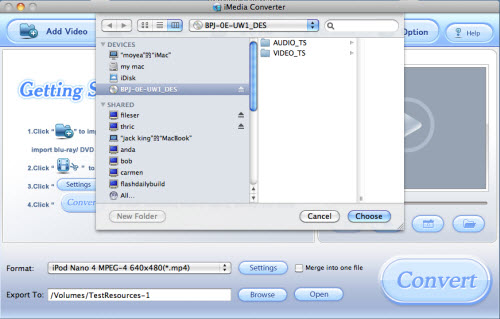
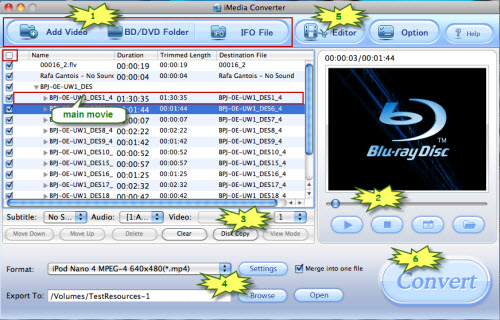
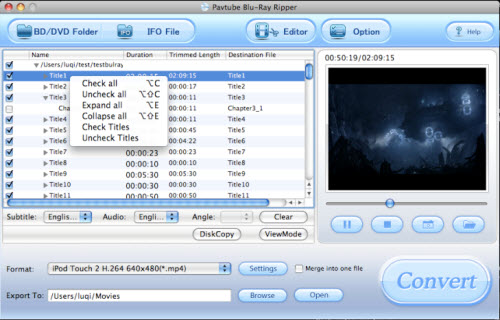
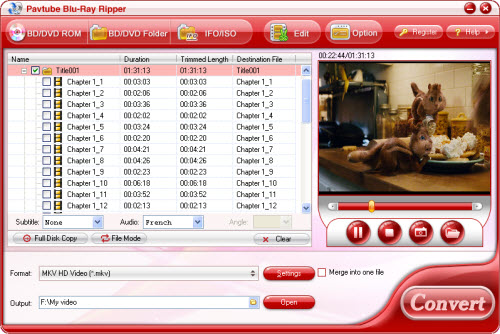
Step 1: Once you run this program, click "DVD Folder" or "IFO File" to load DVD files

All the DVD movie files are checked by default while loading, you can right click on the file to "Uncheck all" or "Check all", so as to select your needed files to convert in an easy way.
Step 2: Select output format for your iPad/iPad 3G
Actually, there are three iPad presets specially optimized for iPad, you can choose anyone of them to satisfy your needs. Every one of them will definitely ensure you a perfect playback quality on your iPad/iPad Wi-Fi+3G.

To see the default video and audio parameters, you can click "Settings" button, and all of these items including codec name, bitrate, aspect ratio, frame rate, sample rate, and audio channels will be clearly presented as below. If you are professional at changing these items, you can adjust them to meet your higher expectation, otherwise, just let them be. Because they are good enough to output a nice quality file for your iPad. User Interface Flash Tool Tip Components Classic Tooltip.

If you still want to try your luck, please follow iPad supported file formats to do your changes.
iPad Supported Video Formats
iPad Supported Audio Formats
Step 3: Click "Convert" button to start ripping DVDs to iPad/iPad 3G video
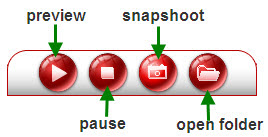
Just take a few seconds to do selection, and after that, you can sit back and relax, the entire DVD ripping task will be finished by this iPad Mac DVD ripper at fast speed. Once the conversion work is finished, you can click "Open" button to get the output DVD movies for your iPad with ease.


 . In this way all contents of the Blu-ray disc will be copied to your hard drive, including the menus, titles, ads, etc. Disk Copy aims to help users to backup the whole contents of a blu-ray disc or standard DVD in the easiest and fastest way. The backup costs much less time than ripping movie to other format. With the Blu-ray and DVD structure, you do not have to create new menu when burning the blu-ray movie to blank blu-ray disc for backup.
 to locate the Blu-ray directory. Open BDMV-> STREAM folder and you will find all the m2ts movie clips. For playing the m2ts files, you may use
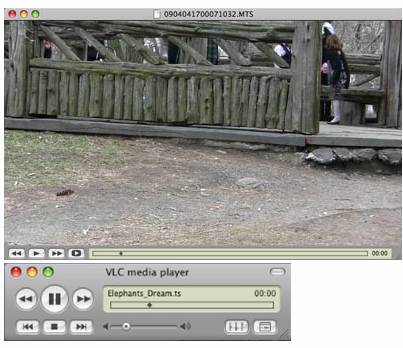

 . In this way all contents of the Blu-ray disc will be copied to your hard drive, including the menus, titles, ads, etc. Full Disk Copy aims to help users to backup the whole contents of a blu-ray disc or standard DVD in the easiest and fastest way. The backup costs much less time than ripping movie to other format. With the Blu-ray and DVD structure, you do not have to create new menu when
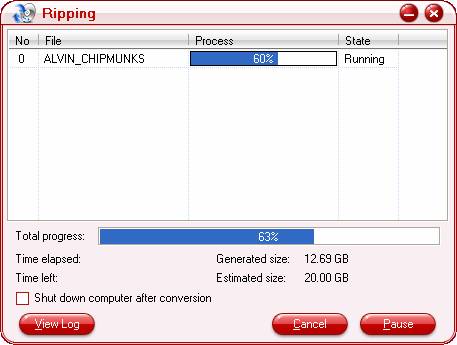
 to locate the Blu-ray directory. Open BDMV-> STREAM folder and you will find all the m2ts movie clips. For playing the m2ts files, you may use