YouTube always provides people with raw video materials on all sorts of things happened worldwide in real time. Video lovers are fond of downloading these files as private collection, even using video editors like iMovie to do further editing of their favorite ones, so as to import them to portable devices like iPod, iPhone, PSP, Blackberry, etc. for playback, or upload to their own websites to share with others, or do something else as they like. It helps you convert your dvd to 3gp converter, dvd to mobile and take it with you on your cell phone.
However, not all the people have found a proper way to download YouTube videos, not to mention how to add these files to iMovie for editing. YouTube videos are in the format of FLV, which is not a workable format in iMovie, so if you want to import YouTube videos to it without trouble, you should convert FLV files to iMovie compatible formats such as MPEG-4 and MOV in advance. With the special intention of solving these two problems, this guide will show you how to download YouTube videos and import them to iMovie for editing step by step. If you are in need, just feel free to go along with it.
Step 1: Download, install and run Pavtube YouTube Converter for Mac
This converter can process downloading and conversion simultaneously. Once you launch it, the interface below well pop up.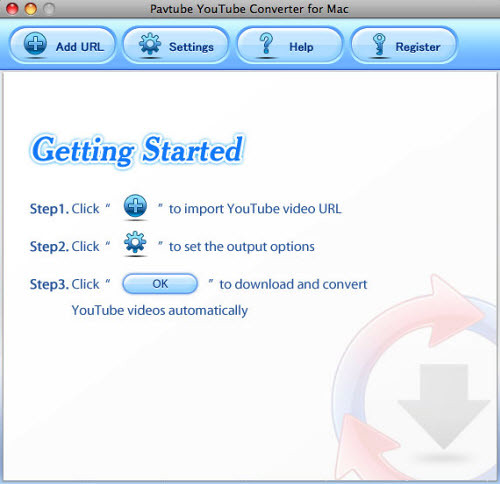
Pavtube iPhone video converter, can convert AVI, MPEG, WMV, MOV, etc to Apple iPod video.
Step 2: Add URL, select output format and set save path
Press tag “Add URL” in the above interface, and then the following window will appear. Just copy and paste the URL of the YouTube video file which you want to download and convert to the text box after “URL”. Then select a supportable format for iMovie by clicking the drop-down list of “Convert To”. Here I choose MOV for example.
Afterwards, you can insert the storage file name in the text box of “Save As”, if not, the program will generate one automatically. Here I save my file as “mycollection”. Meanwhile, you are allowed to hit “Browse” in the opposite side of “Save To” to specify the destination folder. By the way, if you want to save the original FLV files, you are allowed to tick the checkbox “Save FLV File” to achieve this goal.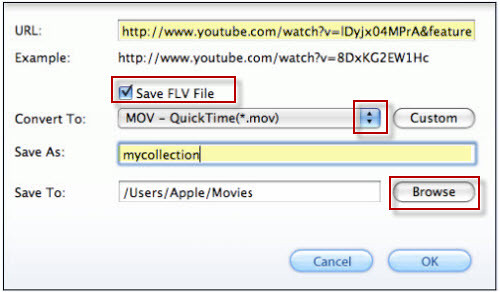
Step 3: Custom
This program enables you to adjust video and audio parameters like codec, bit rate, aspect ratio, frame rate, sample rate, and channels, so that you can change them randomly according to your own demands. Generally speaking, the options which refer to values are always in condition of the larger values, the larger file size, but better quality. Do remember click “OK” to save your custom settings.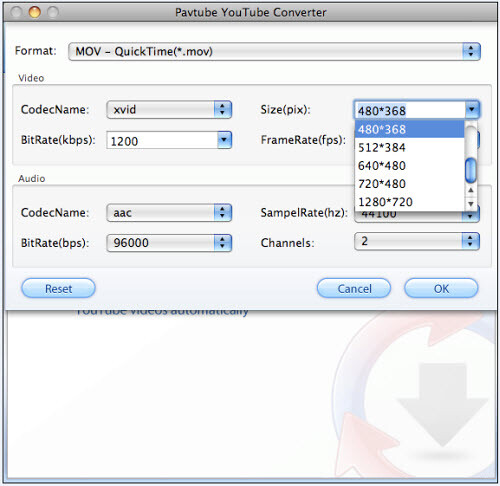
New and used mac laptop, Computers Networking on eBay USA.
Step 4: Download and convert
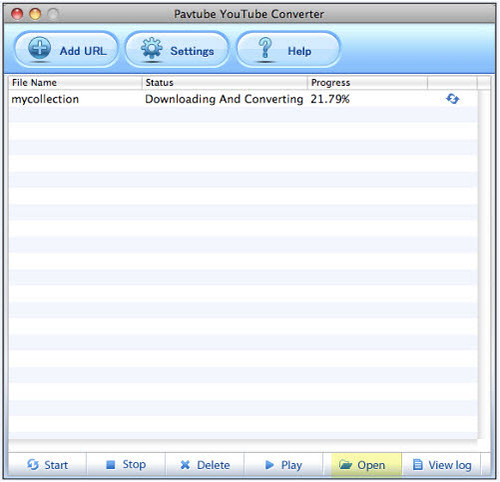
Once all the settings are done, you can click “OK” button to start. The following window will show you the progress of downloading and conversion.
Step 5: Import the output MOV files to iMovie
As soon as the YouTube video files have been downloaded and converted to MOV or other iMovie workable format, you can click “Open” at lower right corner of the above interface to find out the output files. Afterwards, launch iMovie, and click File>Import to add the output files to iMovie for editing.
All right, this guide is ending up now; hope it will do you a favor while downloading video files from YouTube as well as importing them to iMovie for further editing.

No comments:
Post a Comment