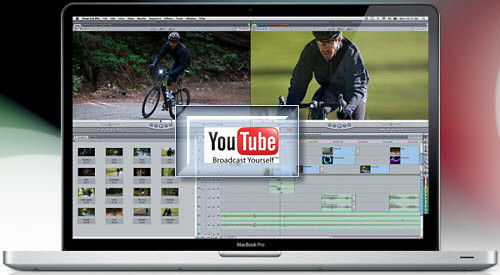
Have you ever encountered troubles while downloading YouTube videos and importing them to Final Cut Pro for further editing? If so, you may find what you want in this article, because it aims to solve the two problems in detailed steps, just feel free to comply with it. Question about new videos on youtube discussion about take part in.
Part one: How to download YouTube videos?
Factually, we can download FLV videos from YouTube via web browser Safari directly. It can be done in several simple steps:
1. Open YouTube.com or other video viewing websites in Safari
2. Open Activity window in Safari by Pressing Command-Option-A, or by selecting “Activity” option in Safari's “Window” menu on the top of the screen.
3. Then scroll to find out the biggest file size which is obviously the video file in Activity window, double-click it, even if it is still loading, after that, Safari will download it.
4. When the download is over, you will find a file named get_video, and you must add the extension .flv to it, by the way, the part before .flv can be replaced by any other text.
Now the download is finished, while Final Cut Pro does not support FLV files directly, thus we need a helpful converter to do us a favor. Please read on the following part.Are you going to download funs movies?
Part two: How to import YouTube video to FCP for editing?
Personally, I usually use Pavtube Video Converter for Mac to convert YouTube FLV files to MOV for FCP. Its operating process is as following:
1. Download, install and launch Pavtube Video Converter for Mac
2. Import YouTube videos, select FCP format and set save path
Click “Add” button to input FLV files downloaded from YouTube to this program, after that, select an output format for FCP by clicking the drop-down list of “Format”, here I select QuickTime MOV for example.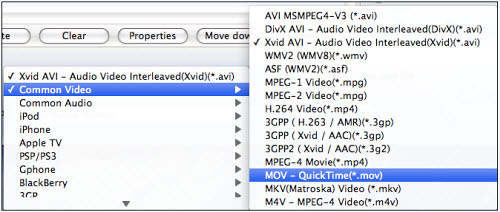
Also, you are allowed to click “Browse” to decide where to export the output MOV files, if not, the converter will save them to a destination folder set by default. By the way, if you want to join several YouTube videos to be a single file, you can tick the checkbox “Merge into one file” to achieve it. After conversion is completed, you are able to find the converted files via pressing button “Open”.
3. Set advanced settings
Suppose you are good at adjusting audio and video parameters, then you can press “Settings” to do this. You can reset all the items on the following window, like codec, bit rate, frame rate and so on.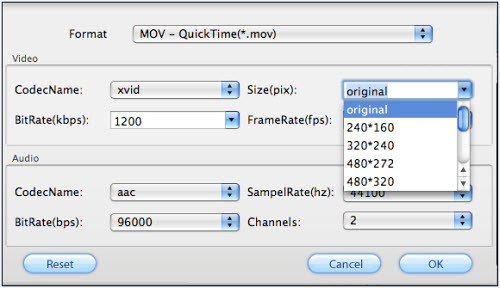
4. Convert
After all the necessary settings are ready, you can click button “Convert” to start the conversion. Pavtube Video Converter for Mac can give you an estimated size of the final generated file, so that you can know if you have enough space to save the output files. Moreover, you will see it also shows you clearly how much time it has spent or how much time it will possibly cost to convert the rest part. The converting window is as below.
Some people may ask if there is a program that can process downloading and conversion at the same time, so that they do not spend too much time and energy on it. In fact, there is, and in Part three it will be introduced in detail.User Interface Flash Tool Tip Components Classic Tooltip.
Part three: How to download and convert YouTube video files for FCP simultaneously?
Step 1: Download, install and run Pavtube YouTube Converter for Mac
Pavtube is capable of processing downloading and conversion simultaneously. As soon as you launch it, the interface below will show up.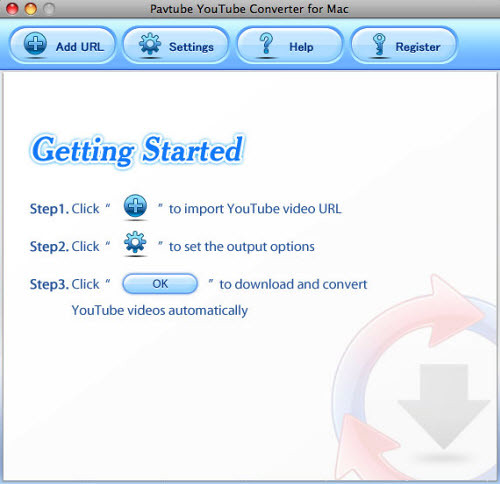
Step 2: Import YouTube URL, select FCP format and set store path
Hit button “Add URL” in the above window, and then the following interface will appear. Just copy and paste the URL of the YouTube video file which you want to download and convert to the text box of “URL”. Then select a workable format for FCP by clicking the drop-down list of “Convert To”. Here I choose MOV for instance.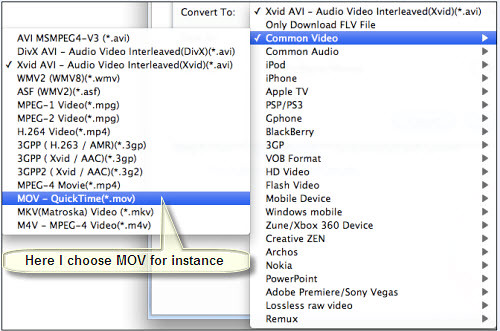
Afterwards, you can insert the storage file name in the text box of “Save As”, otherwise, the program will generate a file name automatically. Meanwhile, you are allowed to hit “Browse” in the opposite side of “Save To” to specify where to locate the output MOV files. By the way, if you want to save the original FLV files, you are allowed to tick the checkbox “Save FLV File” to achieve this goal.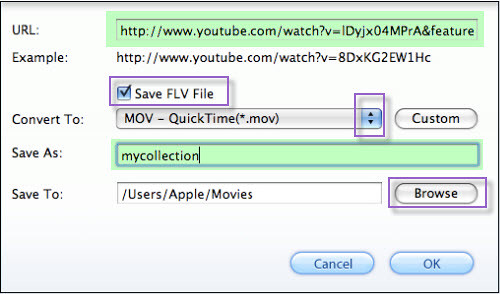
Step 3: Custom
This program enables you to adjust video and audio parameters like codec, bit rate, aspect ratio, frame rate, sample rate, etc, so that you can change them randomly according to your own requirements. Generally speaking, the larger values, the better quality, but the larger file size. Do remember click “OK” to save your custom settings.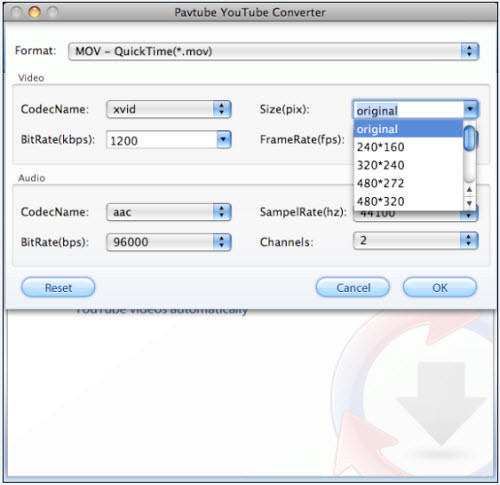
Step 4: Download and convert
Once all the settings are done, you can click “OK” button to start. The following window will show you the progress of downloading and conversion, so as to manage your time properly. If batch downloading and conversion are under way, you can even go out for a walk or take a nap. After downloading and conversion are completed, you can click button “Open” to find the output MOV and FLV files.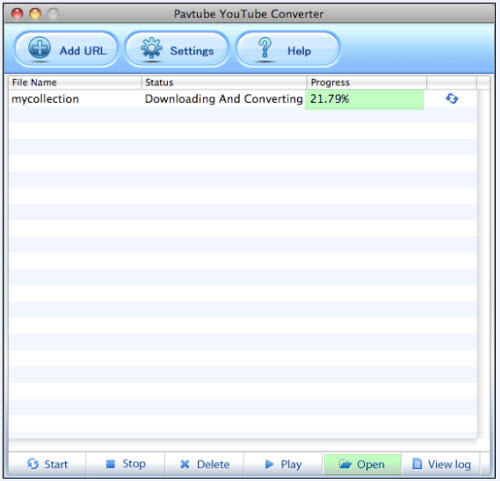
Well, as soon as YouTube video conversion is finished, you can import the output MOV files to FCP to do further editing easily. My post seems longsome, but I sincerely hope it is informative.

No comments:
Post a Comment